
Statische Website mit serverloser Authentifizierung
Posted on 2020/09/26 by Dirk van der Laarse
This post is derived from this guide from Douglas Duhaime. All credit to him.
TLDR: We're going with a Static HTML site from a HTML template hosted on S3 served via Cloudfront, using Lamda@Edge function to handle authorisation/access.
Setting up the static website
Create a new bucket on AWS S3
- Turn on Static website hosting
Warnung
Make sure that public access is not blocked. Note that this will open up your bucket to the whole world.
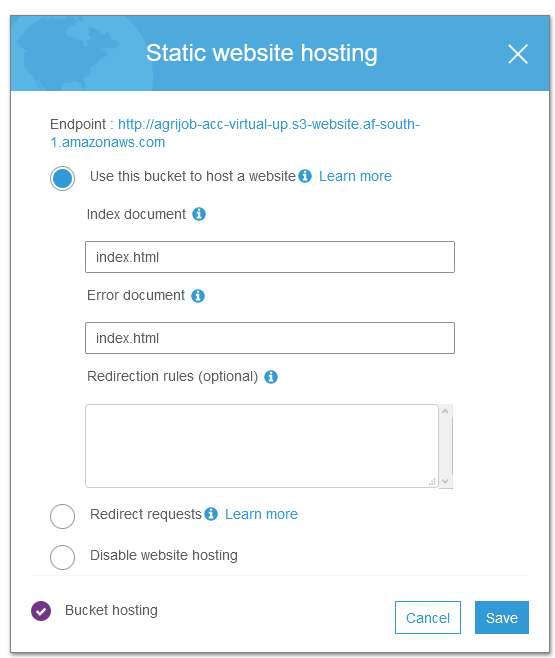
Now you can upload your .html, .css and .js files to the bucket, with public access to all files
Idee
I've found some useful templates on html5up.net.
Next, you need to further configure your S3-hosted website. This guide goes into more detail:
- Register or transfer a domain
- Get an SSL cert issued
- Create CloudFront Distributions
Creating IAM Credentials
Idee
What follows is a very ClickOps-y way to configure services on AWS. You are more than welcome to use Infrastructure-as-Code principles instead
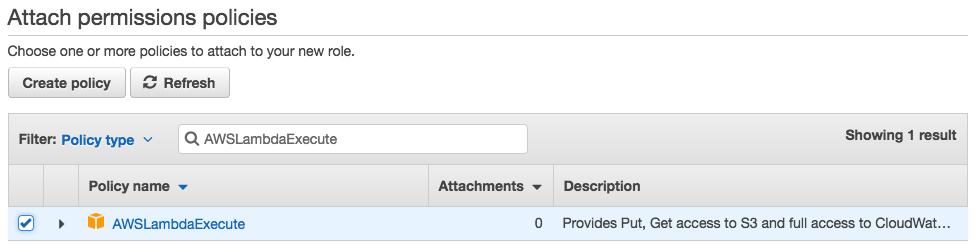
In order to configure Lambda to work with an S3 bucket, we’ll need to create an IAM profile that has access to the bucket. To do so, navigate back go the AWS console and click the link for the IAM service. Once there, click “Roles” in the left-hand sidebar, then “Create role”. On the next screen, under “Choose the service that will use this role” click “Lambda”, then click “Next: Permissions” at the bottom of the screen. Search for and select the “AWSLambdaExecute” role:
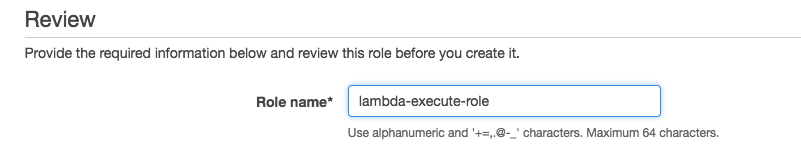
Then click “Next: Review” at the bottom of the page. On the next screen, name your role “lambda-execute-role”, then click “Create role”:
On the next page you should see that your Lambda role has been created. Once it’s created, click on the link to the role, then click “Trust relationships”, then click “Edit trust relationship” and replace the contents with the following:
{
  "Version": "2012-10-17",
  "Statement": [
    {
      "Effect": "Allow",
      "Principal": {
        "Service": [
            "lambda.amazonaws.com",
            "edgelambda.amazonaws.com"
        ]
      },
      "Action": "sts:AssumeRole"
    }
  ]
}
This update allows the policy to interact with Lambda@Edge, which is the service that provides the authentication logic. Once that’s all set, you are ready to proceed to using this role in Lambda itself.
Creating the Authentication Layer with AWS Lambda
With all the stage-setting in place, we can now create the actual logic that will handle user-authentication. To do so, return once again to the AWS console. Once you’re there, take a look at the black navigational bar at the top of your screen. Off to the right you should be able to select the “region” in which you wish to operate. For this next step you must be in the N. Virginia region (a.k.a. us-east-1). Once you’re in the N. Virginia region, click the link for “Lambda”.
Lambda is a piece of AWS’s “serverless” stack that allows one to run serverside code without having to build, run, and maintain a whole server. We’ll use it to run our authentication logic. On the Lambda landing page, click the orange button that says “Create a function”:
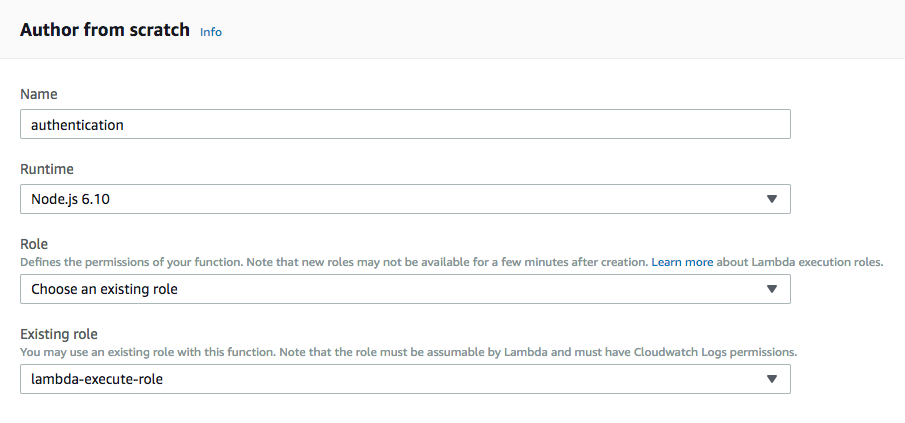
On the next page, keep “Author from scratch” selected. Name the function “authentication”, select Node.js as the runtime, select “Choose an existing role” , and select “lambda-execute-role” as the existing role to use (this is the role we just created in the IAM console):
Finally, click “Create function” at the bottom of the page. Scroll down to the code editor and paste the following snippet into the input field:
exports.handler = (event, context, callback) => {

  // Get the request and its headers
  const request = event.Records[0].cf.request;
  const headers = request.headers;

  // Specify the username and password to be used
  const user = 'user';
  const pw = 'password';

  // Build a Basic Authentication string
  const authString = 'Basic ' + new Buffer(user + ':' + pw).toString('base64');

  // Challenge for auth if auth credentials are absent or incorrect
  if (typeof headers.authorization == 'undefined' || headers.authorization[0].value != authString) {
    const response = {
      status: '401',
      statusDescription: 'Unauthorized',
      body: 'Unauthorized',
      headers: {
        'www-authenticate': [{key: 'WWW-Authenticate', value:'Basic'}]
      },
    };
    callback(null, response);
  }

  // User has authenticated
  callback(null, request);
};
This snippet exports a single function that takes as input the three default arguments Lambda provides to Node.js functions docs. The function then pulls out the user’s HTTP request and its headers, specifies the correct username and password, and checks to see if the user’s request contained the username and password in its authentication headers. If not, it prompts the user to authenticate; if so it allows the user into the site.
After defining the function, click "Deploy"”
Next, under the “Designer” section toward the top of the page, click “CloudFront”, which will move CloudFront into the triggers portion of the displayed diagram:
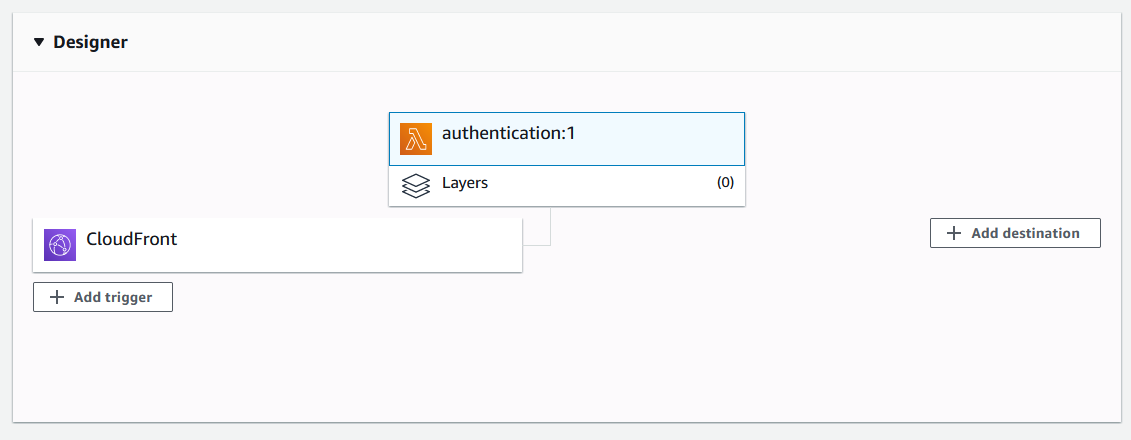
If you then scroll down a bit, you’ll see a section titled “Configure triggers”. Select your CloudFront distribution’s ID under the “Distribution” selector (this is displayed under the ID column in your CloudFront distribution list), make sure you select “Viewer request” as the CloudFront event that will trigger the function defined above, and click the box that says “Enable trigger and replicate”:
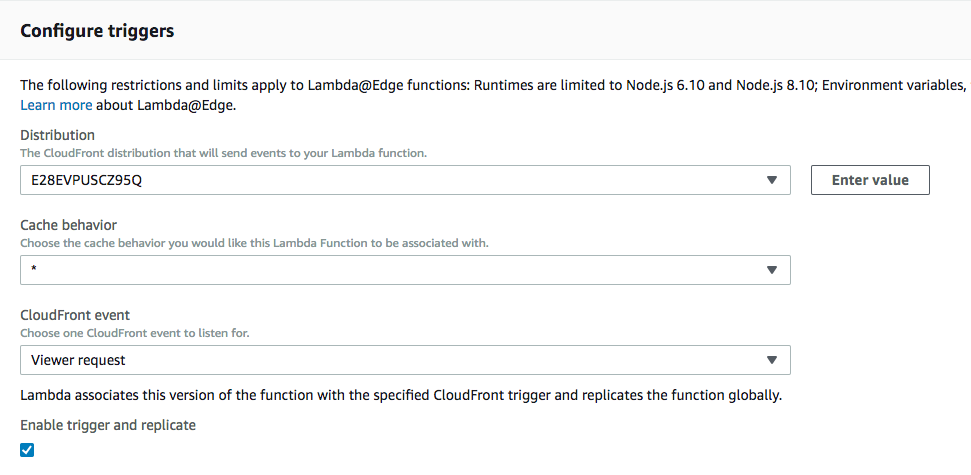
If you then try to access the address specified under the “Domain Name” column in your CloudFront distribution list [example], you’ll be prompted for a username and password:
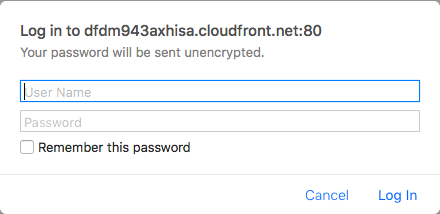
If you type “user” and “password” as the credentials (or whichever values you set as the username and password in your lambda password), you’ll see the site itself!
Changing from Basic Auth to Bearer Auth
So this is where I got stuck or "ran out of time". The best way to implement this is using Authentication Cookies with Lambda@Edge.